Conditions on the Owen-Spalding Route
April 9th, 2016


The Middle Teton inside Garnet Canyon.
Temperatures reached into the 60's at the valley floor during the week leading up to the ascent. Ice from last fall was under some snow. Ice was exposed in a few locations that were off route but ice wasn't a hazard. We certainly didn't need technical ice-climbing tools. The route might have been navigated without mountaineering crampons & without an mountaineering axe. They are highly recommended for traveling over snow, however. You will certainly move faster if you're sure of your footing.

You're looking at the south aspect of Disappointment Peak inside Garnet Canyon - approaching the Meadows. Warm temps & rain will get the snow moving again. And the rocks falling.

Ski tracks. Looking east.

Middle Teton.
Approaching the Meadows Camping Zone.
Approaching the Meadows Camping Zone.

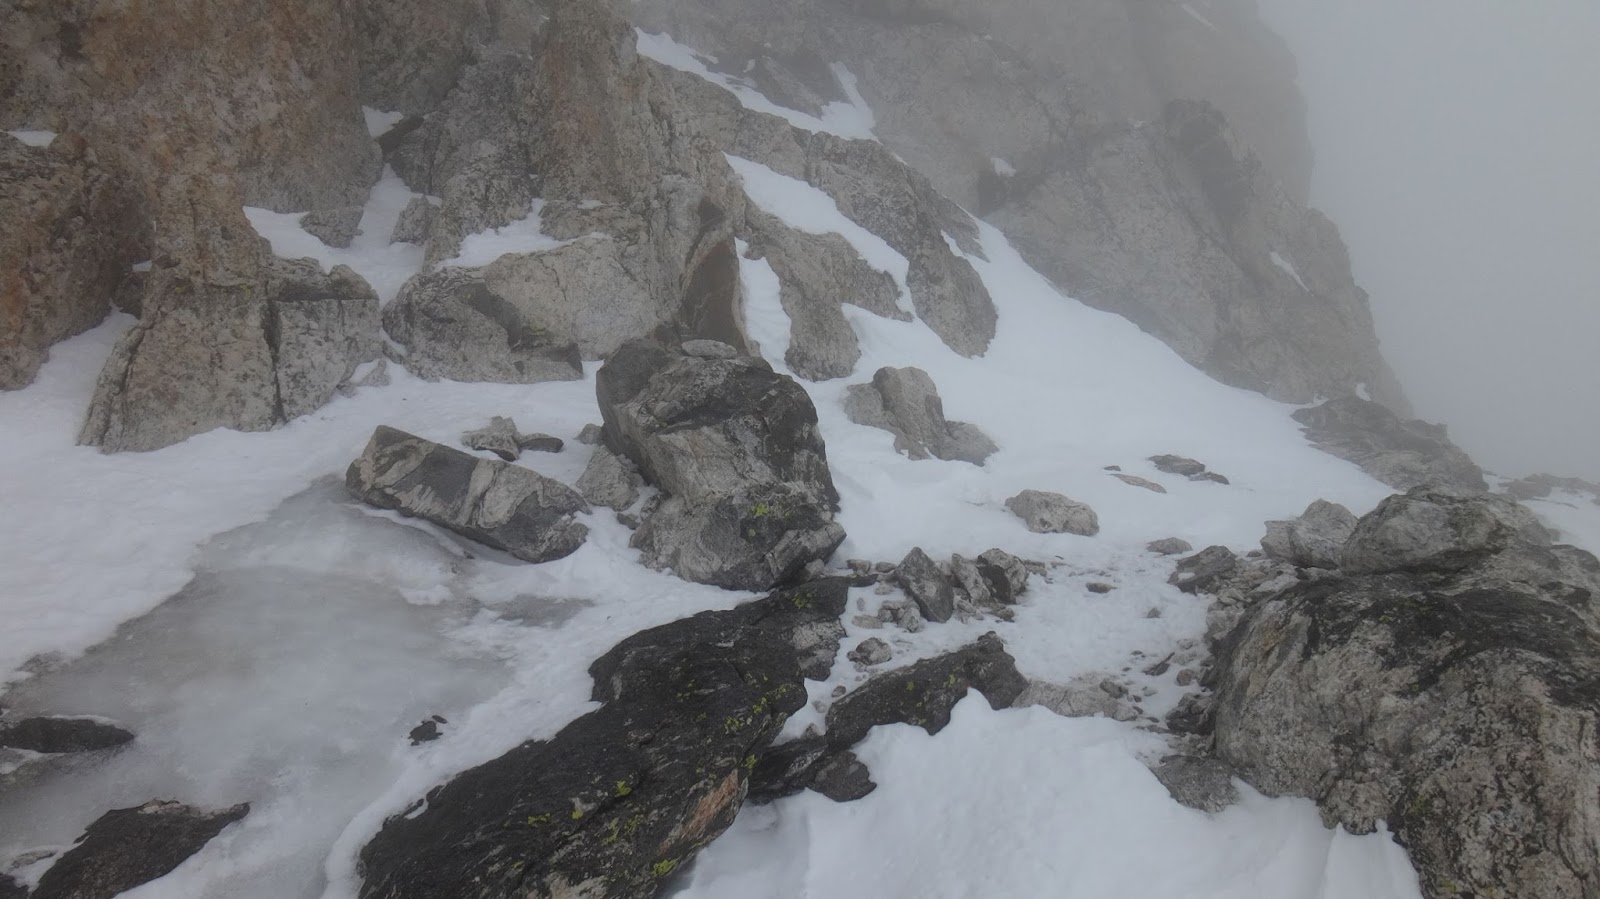
Right side of Meadows' Headwall
Early in the season, climbers heading for the Grand usually stay closer to the Middle Teton's NE aspect at the left side of the Meadows' headwall to gain the north fork of Garnet Canyon. Some skiers headed for Teepe Glacier (or the descent into Glacier Gulch) will skin up the summer switchbacks at this time of year (see above). That path can be used for reaching the Lower Saddle but it is usually avoided. The threat level is considered to be higher due to the cliff bands above Spalding Falls. Choose your path carefully given the natural hazards.


A little sluffing
The snow wasn't really moving on this day except for the wide wet slab (see further below, too) which has been inching down the rock band over the last couple of a couple weeks.

Meadows' Headwall
Of course, conditions change daily & hourly but we found firm snow all day at this headwall all day. Nice and punchy.
Of course, conditions change daily & hourly but we found firm snow all day at this headwall all day. Nice and punchy.

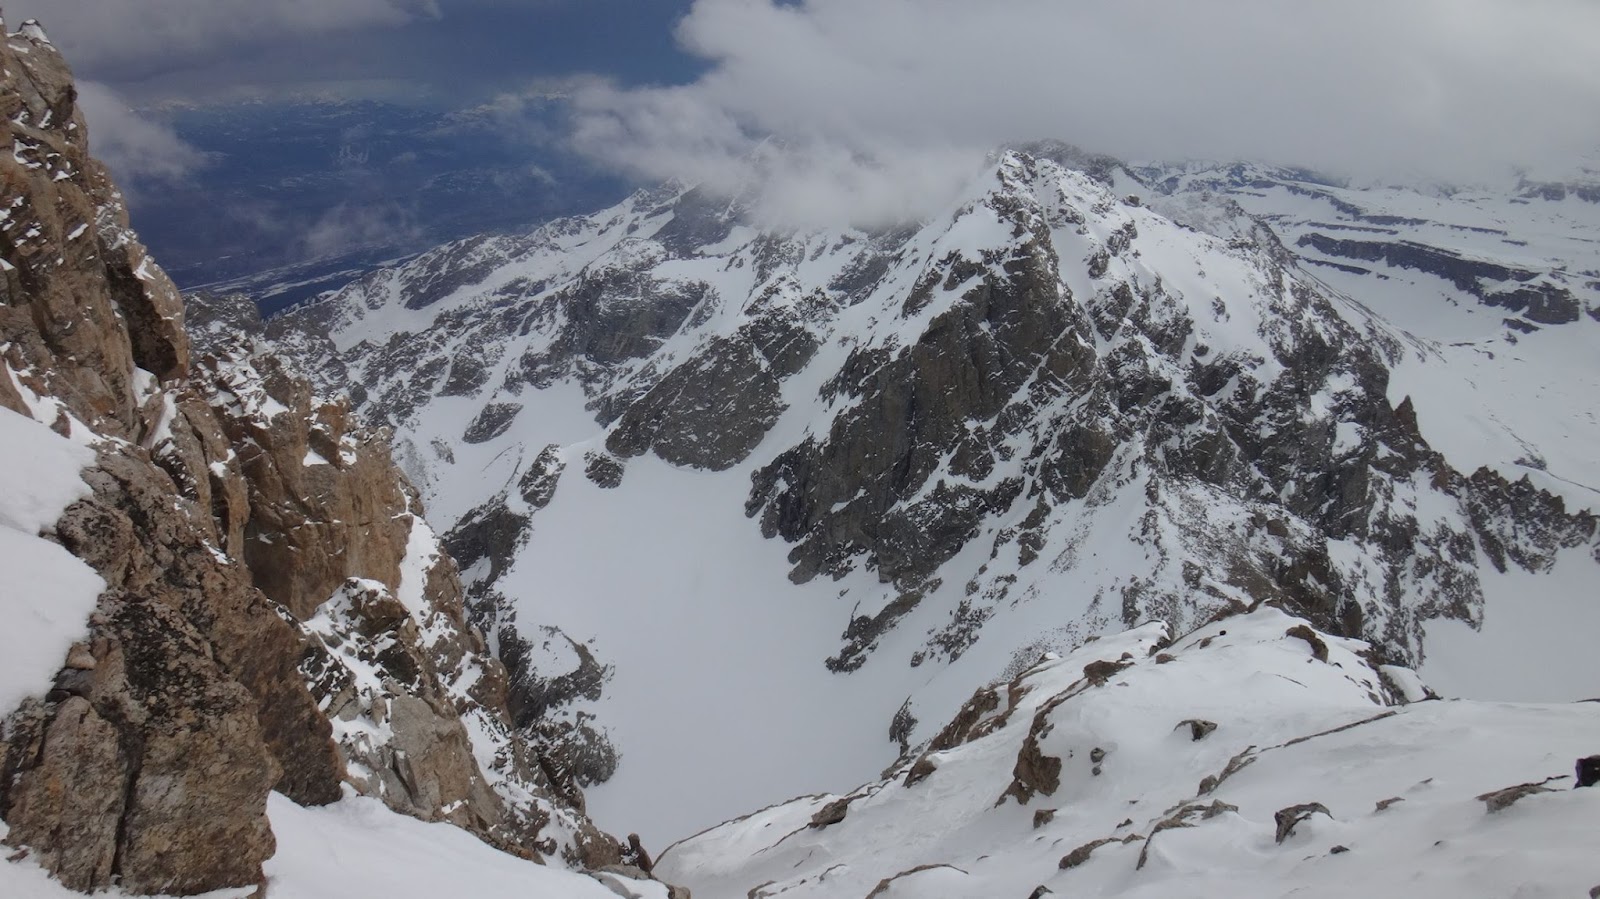
East Face of the Grand Teton

This thin slab on the Meadows' headwall has been slowly moving over the last 2-3 weeks.

South Fork of Garnet Canyon

Two skiers skinning up the Meadows' headwall.

The Meadows' Headwall
We are closer to the Middle Teton and in the North Fork of Garnet Canyon. Looking back east.

We're looking east from the small bowl just above the steeper part of the Meadows' headwall. At the top of this bowl is the view west toward the Lower Saddle - see below.

The Lower Saddle
Looking west at the Moraines, the Middle Teton Glacier, and the Grand Teton's Lower Saddle.

Middle Teton Glacier - north aspect. Looking SE.

The Lower Saddle's Fixed Rope. Looking west.
The Fixed Rope area was a more direct line for us so we took it. The actual rope wasn't very useful. It was an easy scramble with all the stable snow.

After leaving the Fixed Rope we headed to the northwest over snow. This is not the way to go during the summer because it's too easy to kick rocks on unsuspecting climbers below you. This is the view SE. We're looking back toward the Moraines & the Middle Teton Glacier. Bradley Lake at top left.

The two skiers skinning up the Middle Teton Glacier.

Click to enlarge


We're just past the Needle's Chockstone Chimney and looking north. With snow, many climbers will try hiking up the drainages to the Upper Saddle.

Chockstone Chimney - Looking NNE.
We scrambled up the Chockstone Chimney on the easy snow. On the way down, we took the Briggs' Slab.

Central Rib's Bench
We followed the YELLOW dots to reach the Black Rock Chimney. We came down the path marked with RED dots. We rarely use the two drainages on each side of the Upper Western Rib.

Central Rib - western aspect
The Central Rib's Bench was easy to scramble up. This snow was grippy without postholing.

The Upper Crossover is for Upper Exum Climbers
BRC: Black Rock Chimney
UWR: Upper Western Rib
BRC: Black Rock Chimney
UWR: Upper Western Rib

A narrow extension of the Chockstone Chimney runs to the Central Rib's Lower Crossover. UXM climbers pass over the Central Rib at this location to reach Wall Street. We were not headed to the UXM Route so we did not go over the crossover.

Looking back SW toward Idaho with Dartmouth Basin below the saddle

We climbed to the top of the Chockstone Chimney and bypassed the Eye of the Needle. The EOTN was plugged with snow. It would have been easy to climb over the natural tunnel but it was just as easy to climb out of the Chockstone Chimney by the Briggs' Slab. The deep snow makes it almost effortless compared to a dry ascent. We then took the path shown by the YELLOW dots and headed for the Upper Saddle.

Looking southish.


We ended up taking a detour above the Black Rock Chimney's steppy ramp to avoid some unstable snow. The variation we took had some pockets of ice but it was fairly easy to navigate. Climbers can use many variations to avoid unstable snow or bypass ice. To see individual features along this route in more detail, visit our GT Features page.
April's conditions can be better than May's conditions because the temps are cooler and freeze & thaw cycles are not generating new ice. It tends to rain more in May but every year is different.

We came down the red route.
Looking NW.
Looking NW.

Looking down into the Black Rock Chimney.
We bypassed this lower section but it could have been easily climbed. Looking southish. The unstable snow was further down the route by the steppy ramp.

The view from the upper exit of the Black Rock Chimney. Looking northish.
We are looking across a small bowl. It's at a natural opening in the Central Rib that drains to the east. From the 'Opening' in rib (see above), we took the next photo.

Looking northish.
The drainage to the Wall Street Couloir is to our right.

Central Rib
This is the view down the drainage after exiting the Black Rock Chimney. Wall Street takes you to the Upper Exum Route. This bowl-like opening in the Central Rib usually has very deep snow due to drifting. The bowl shape is more obvious when it is dry.

Upper Saddle
View from just below the Upper Saddle toward the Main Rappel area. Looking NE.

Upper Saddle
We are looking NE toward the Main Rap to the Upper Saddle. We are approaching the upper eastern side of the saddle. The southern route to reach the upper part of the Upper Saddle was sketchy with sugar snow. We took the northern route which is exposed above Valhalla Canyon. The southern route is slightly less exposed above the Exum Gully. You can climb between the two exposed variations. The snow was stable on the northern side.

Upper Saddle
 The Owen-Spalding Climbing Route above the Upper Saddle
This is the southern variation to gain the eastern side of the Upper Saddle. It's where a guided climber fell over boulders and into the Exum Gully. We did not take this route due to snow conditions.


Click to enlarge

Upper Saddle
The summit block was easier to navigate than it was on August 9th, 2015 & October 25, 2015. Notice the lack of ice.

The Owen-Spalding's exposed Belly Roll.
We went over the Belly Roll on the way up, and under it on the way down.

The snow was pretty stable.
Looking northish.
Looking northish.
The red/blue webbing was attached to a very old piton. The piton may, or may not, survive the forces placed upon it during a fall but it can be used as a hold for slip protection.
A well-planted axe will help you navigate the exit from the Crawl. The ledge next to the wall is stable but the north end of the Crawl is a sketchy area (by the webbing) when snow covers everything if you stray too far from the wall. You may misjudge the stability of the snow. We took the 1st Entrance to gain the Double Chimney. Any protection on this mountain, like this webbing, could be old and poorly secured. There are old pitons, cams, nuts, rings, webbings, and ropes in many places. Some are decades old.
A well-planted axe will help you navigate the exit from the Crawl. The ledge next to the wall is stable but the north end of the Crawl is a sketchy area (by the webbing) when snow covers everything if you stray too far from the wall. You may misjudge the stability of the snow. We took the 1st Entrance to gain the Double Chimney. Any protection on this mountain, like this webbing, could be old and poorly secured. There are old pitons, cams, nuts, rings, webbings, and ropes in many places. Some are decades old.

Looking NW.

Inside the middle of the Double Chimney.
Looking east.
Looking east.

View into Valhalla Canyon with Cascade Canyon at top.
Looking NW.
Looking NW.

Access to Catwalk
This is the view from the top of the Double Chimney. You can access to the Catwalk from here if you wish. You can also access the Catwalk from the Owen Chimney's first opening. Looking SE.

We took the Owen Chimney to access the Catwalk.
You exit at the first 'opening'.
Looking east.
You exit at the first 'opening'.
Looking east.

Looking back toward the exit from the Double Chimney.
Looking west.
Looking west.

The Owen Chimney and the Bypass.
The bypass is more of a crack & slabs than chimney.
The bypass is more of a crack & slabs than chimney.

Owen Chimney
It's in pretty good shape. As the snow melts later in the spring and as rain falls, ice will form due to the freeze and thaw cycles. Additionally, any ice from last fall (that's under the snow) may become exposed as we get closer to June.

Access to the Catwalk from the Owen Chimney.
Looking north.
At the first opening in the Owen Chimney, you head south around a tight corner to gain the Catwalk.
Looking north.
At the first opening in the Owen Chimney, you head south around a tight corner to gain the Catwalk.

The view from the Catwalk.
Looking northish toward Jackson Lake.
Looking northish toward Jackson Lake.

Cascade Canyon. Looking NW.

The Catwalk.
We're looking northish back toward the Owen Chimney (unseen).

The Main Rap Overlook - top center
This is the scramble off the Catwalk toward the Main Rap Overlook. Looking SE. Plenty of dry rock.

The Catwalk - looking northish
(where we just walked)
The snow was super stable and grippy.
(where we just walked)
The snow was super stable and grippy.

Main Rappel
We're looking SE toward the Main Rap from the Main Rappel Overlook.

We walked from the Main Rappel area to the ledge below Sargent's Chimney on easy snow. We then went toward the top of the Owen Chimney to examine the exit from the Owen Chimney.

The exit from the top of the Owen Chimney.
Looking N-NW.
Looking N-NW.
The NW base of Sargent's Chimney.
Looking SE.
There's some ice from last fall. Not in our path, however.
Looking SE.
There's some ice from last fall. Not in our path, however.

Sargent's Chimney.
Looking NW.
Looking NW.

Sargent's Chimney.
Looking SW.
Looking SW.

Sargent's Chimney.
We're looking NE toward the Hidden Exit - not up the main chimney. Plenty of dry handholds and good snow.

Sargent's Chimney.
We're looking NE toward the Hidden Exit - not up the main chimney.

Sargent's Chimney - main chimney.
We took the Hidden Exit.
Looking east.
We took the Hidden Exit.
Looking east.

Looking SW.

Corner crack at Sargent's Hidden Exit
This is completely filled in with snow which makes it easy to ascend.
This is completely filled in with snow which makes it easy to ascend.

After climbing the corner crack, you reach this area.
Middle of Hidden Exit
Middle of Hidden Exit

Another corner crack to exit the Hidden Exit.
This is actually a corner in a small chute.
This is actually a corner in a small chute.

Top of Sargent's main chimney - see rap slings.
After exiting the Hidden Exit you can look to your south and see where you would have exited Sargent's main chimney (by Sargent's rappel) had you taken that line of ascent. A ledge runs between the two.

Chute out of the Hidden Exit.
Again, this location is directly north of the exit from Sargent's main chimney. From here, you will walk to the north for a very short distance and make a turn to the east as soon as it is easy to do so. From there it is a straight NE shot to the summit but you may want to zig-zag around some rock features.

Looking NE.
Again, it's a straight shot to the summit once past Sargent's Hidden Exit but many people zig-zag their way up.

Slabby Wall
We bypassed the center crack and scrambled to the SE and then to the NE on switchback ledges. Looking NE.

View of the SE-switchback.

Looking N-NE
We took a ledge above the Slabby Wall on our way to the summit. The summit is to the NE of the photographer. The ledge is a common 'switchback' route to avoid climbing the Slabby Wall.

The summit monument. Looking North.

Looking NW.

Sargent's Chimney during the descent.
Looking SW.
Looking SW.
We are in the Hidden Exit and looking down at the corner crack used to gain the Hidden Exit. Many climbers climb directly up Sargent's main chimney but the majority take the alternate Hidden Exit.

Middle of the Hidden Exit.
Looking W-NW
Looking W-NW

Main Rap Overlook.
Scramble to the N-NW (left) to gain the Catwalk. The Main Rap is to the SE (right).

Scramble to the Catwalk. Looking N-NW.

Jackson Lake

Sargent's Chimney
This is the view back toward Sargent's Chimney from the Main Rap Overlook. Looking NE.

The Catwalk.
Looking northish.
Looking northish.

The Enclosure - looking west.

Owen-Chimney Bypass Crack.

Double-Chimney Bypass
Looking N-NW.
Looking N-NW.
The DC Bypass is harder than the DC. It's is just NW of the bottom of the Owen Chimney. It's mostly used by climbers coming off the North Ridge, etc.

Access to the top of the Double Chimney.
Looking west.
Looking west.
We are on the slabs just above the Double Chimney. If the slabs here are really sketchy, try using an approach from the north to gain the top of the DC (just to the photographer's right in this picture). That line may have better holds or easier to clean holds. With crampons, it's all pretty easy.

View into the Double Chimney - descent.
The Open-V is on the left side. The tunnel variation is plugged with snow.
The Open-V is on the left side. The tunnel variation is plugged with snow.

The Belly Roll - descent.
Looking southish.
Looking southish.

The ledge below the Belly Roll. We took the ledge below the BR.

Upper Saddle
Getting off the eastern side of the Upper Saddle. We took the exposed route marked with BLUE dots.

View toward the Middle Teton.
Looking southish.
Looking southish.

Upper Saddle Main Rappel
This is the view back toward the Main Rappel to the Upper Saddle. Looking NE.

View just off the Upper Saddle.
We took the OS Couloir down to the Central Rib's Bench. Looking SW. Of course, you could take the Wall Street Couloir and exit before it cliffs out. Most likely, you would exit via the Central Rib's crossovers. We do not suggest using the WSC unless you are familiar with it.
Middle Teton, etc.

Wall Street.

Easy walk down the Owen-Spalding couloir.
Snow was grippy.
Looking S-SE.
Snow was grippy.
Looking S-SE.

Drainage (OS Couloir)
This is between the CR's bench & the Upper Western Rib. This is where we cross from the rib to the bench. You'll notice that the drainage narrows and falls below the bench. That drainage is not a good summer route due to rockfall hazards.

Central Rib
This was our route up to the Upper Saddle via a variation of the Central Rib's Black Rock Chimney.

We took the Briggs' Slab on the way down.
We climbed the NE corner of the CC on the way up.
We climbed the NE corner of the CC on the way up.

View from Briggs' Slab

The NE corner of the CC that we climbed on the way up.

Upper part of the CC.

Looking NW at the OS Couloir

Looking NW toward the gap between
the Lower & Upper Western Ribs.
the Lower & Upper Western Ribs.
You can bootpack up this gap when it's filled with snow. It's not a recommended route when the area is melting off because rockfall is increasing and snow can slide off the Enclosure's SW ridge.

Looking SW from Briggs' Slab area

Looking southish.

View just below the Briggs' Slab to the south.

Lower Saddle's Headwall.
We walked straight down it.
Looking west.
We walked straight down it.
Looking west.
This is the normal glissade path. On the way up, we went by the Fixed Rope which is a little further north of here.

A view toward the summer climbers' trail from the 'winter' trail.
Looking NE.
Looking NE.

Meadows' Headwall
The wet slab on the Meadows' headwall moved ever so slightly while we were gone.

Bradley Lake. Garnet Creek is also known as Bradley Creek.
We took the ridge route on the way up, but took the lake route on the way down. Looking east.

Bradley Lake
~ A few trip reports ~
April through October
April through October
July 17th, 2016 (UXM) PNG Variation
~~~~~~~~~~
Overview - Owen-Spalding
Route Photos - Marked Up
Grand Teton Webcams
All images may be used without permission or attribution for all not-for-profit purposes.
Enjoy Safe Climbing