The Last Climb of 2015
Free-soloing under these conditions is not recommended unless you have experience with mixed conditions on this route. Above the Double Chimney, everything provided enough good holds for moving efficiently. We had slightly worse conditions on August 9th of this year. We often solo without crampons in thin snow & moderate ice but they are recommended for most climbers - or shoes cleats. You can rent crampons from Teton Mountaineering in Jackson.


Free-soloing under these conditions is not recommended unless you have experience with mixed conditions on this route. Above the Double Chimney, everything provided enough good holds for moving efficiently. We had slightly worse conditions on August 9th of this year. We often solo without crampons in thin snow & moderate ice but they are recommended for most climbers - or shoes cleats. You can rent crampons from Teton Mountaineering in Jackson.


The ridge leading to the switchbacks into Garnet Canyon. On the south side is the Burned Wagon Gulch trail which meets up with this trail at the Bradley Lake Junction.

Switchback running into Garnet Canyon

First Boulder Field
First Boulder Field by the Platforms' Camping Zone & Garnet Creek. The trail restarts by the creek after you leave the boulders.

That time of year....ice.

Garnet Creek

Middle Teton rising above the Meadows in Garnet Canyon. The summer climbers' trail runs to the north side of Spalding Falls.

South fork of Garnet Canyon is the route to the Middle Teton's South Col.


South Fork of Garnet Canyon

View from the switchbacks leading to the top of Spalding Falls. The Meadows Camping Zone is below.

Caves Camping Zone in trees
The Petzoldt's Caves Camping Zone is by the trees atop the cliff band. There is a camping spot hidden away behind the photographer and another one is above the spring feeding Spalding Falls.

The South Teton, Ice Cream Cone, Gilkey Tower, Spalding Tower, Cloudveil Dome, & Nez Perce (far left)rise above the South Fork of Garnet Canyon.The Middle Teton is on the far right.

North Fork of Garnet Canyon. The lower end of the snow field is just above the steeper section of the Meadows' headwall where Gary Miller lost his life in 2013.

Pinocchio Pinnacle and Bonnie Pinnacle.

Moraines
The Grand Teton's Lower Saddle is at the west end of the moraines. North Fork of Garnet Canyon. The trail to the Morainal Camping Zone will disappear at a 2nd Boulder Field. Continue for about 50' or so and look to your south for the sign by a drainage. Or look for tents at the camping spot a short distance from the sign. The trail starts up again by the sign.

The Grand Teton's East Face.
Teepe Pillar is on the left. Theodore Teepe was killed while descending the large snowfield on the upper eastern face of the peak. It's now known as Teepe Glacier. His death was the first known mountaineering death in the Teton Range.

Lower Saddle & the Middle Teton Glacier.
The Grand Teton is on the right.
The Grand Teton is on the right.

Middle Teton Glacier & the Glacier Couloir

Ice in the drainage from the Stettner Couloir.
Rock & snow avalanches are possible out of this drainage.
Rock & snow avalanches are possible out of this drainage.

The Fixed Rope at the Lower Saddle's headwall.
When the approach is covered in snow, a bootpack across the headwall is used instead of the Fixed Rope.

The Morainal Camping Zone is near the middle of the photo.
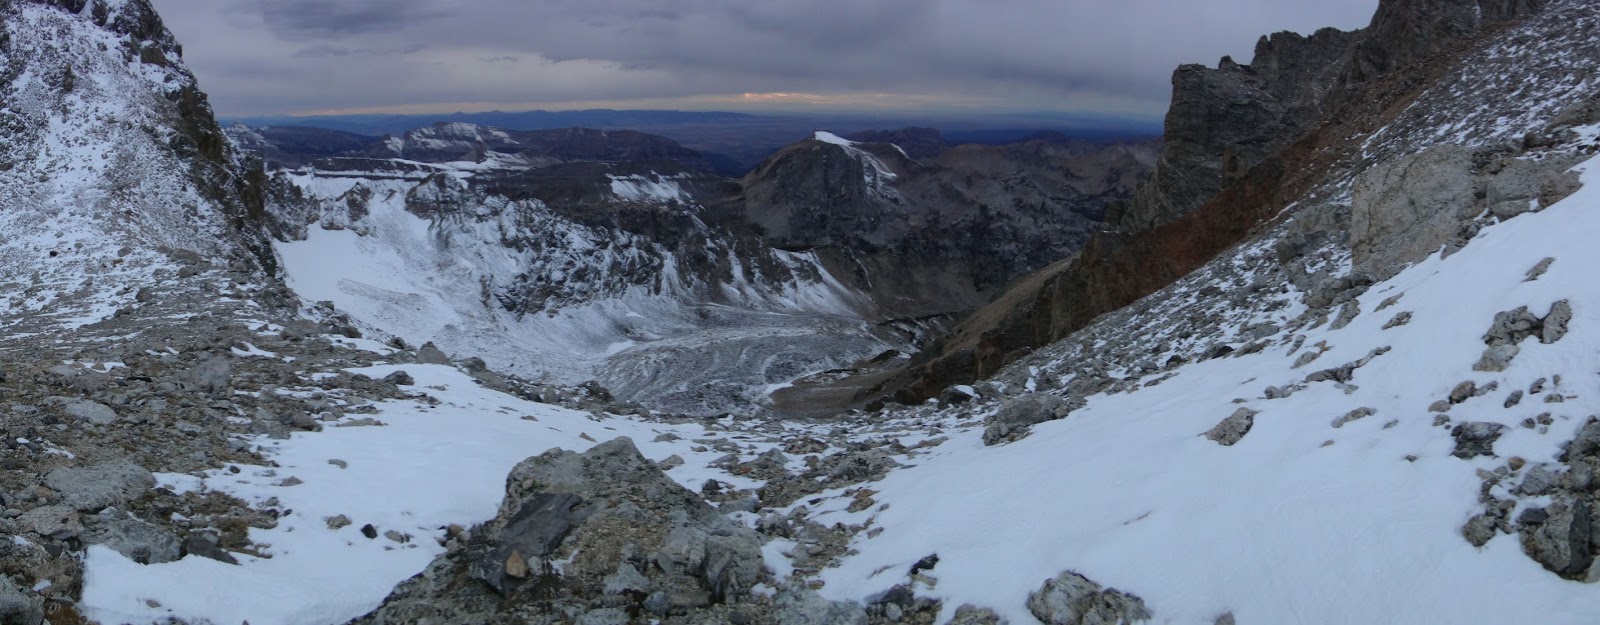
The North Fork of Garnet Canyon as seen from the Lower Saddle.
The North Fork of Garnet Canyon as seen from the Lower Saddle.

The Grand Teton as seen from the Lower Saddle.
Follow the trail along the crest of the saddle to the western side of the Needle.

Temps at the Saddle - balmy.

View to the east out of Garnet Canyon.

The Lower Saddle as seen from the approach to the Central Rib's Needle.


The Needle's Chockstone Chimney - far right.
We are on the western side of the Central Rib's Needle.
We are on the western side of the Central Rib's Needle.

The main drainage from the Enclosure and past the Central Rib's Needle.
This is sometimes referred to as the Owen-Spalding Couloir.
This is sometimes referred to as the Owen-Spalding Couloir.

A little ice in the pocket.
You can climb the drainage but it is not recommended if climbers are above you. This is a rockfall zone and it's often icy & wet. Much of this icy is from water draining off the Central Ribs Bench instead of down the drainage.

The approach to the Briggs Slab, Cracks of Death, Sack of Potatoes, etc. Looking east.

The Briggs Slab (foreground), Eye of the Needle in background. Looking southish.

Looking back at the approach to the Briggs Slab.
The main drainage area (Owen-Spalding Couloir) was easy to navigate. The approach to the Briggs Slab can be sketchy at this time of year if you're not wearing crampons but it's possible to navigate if you're careful.
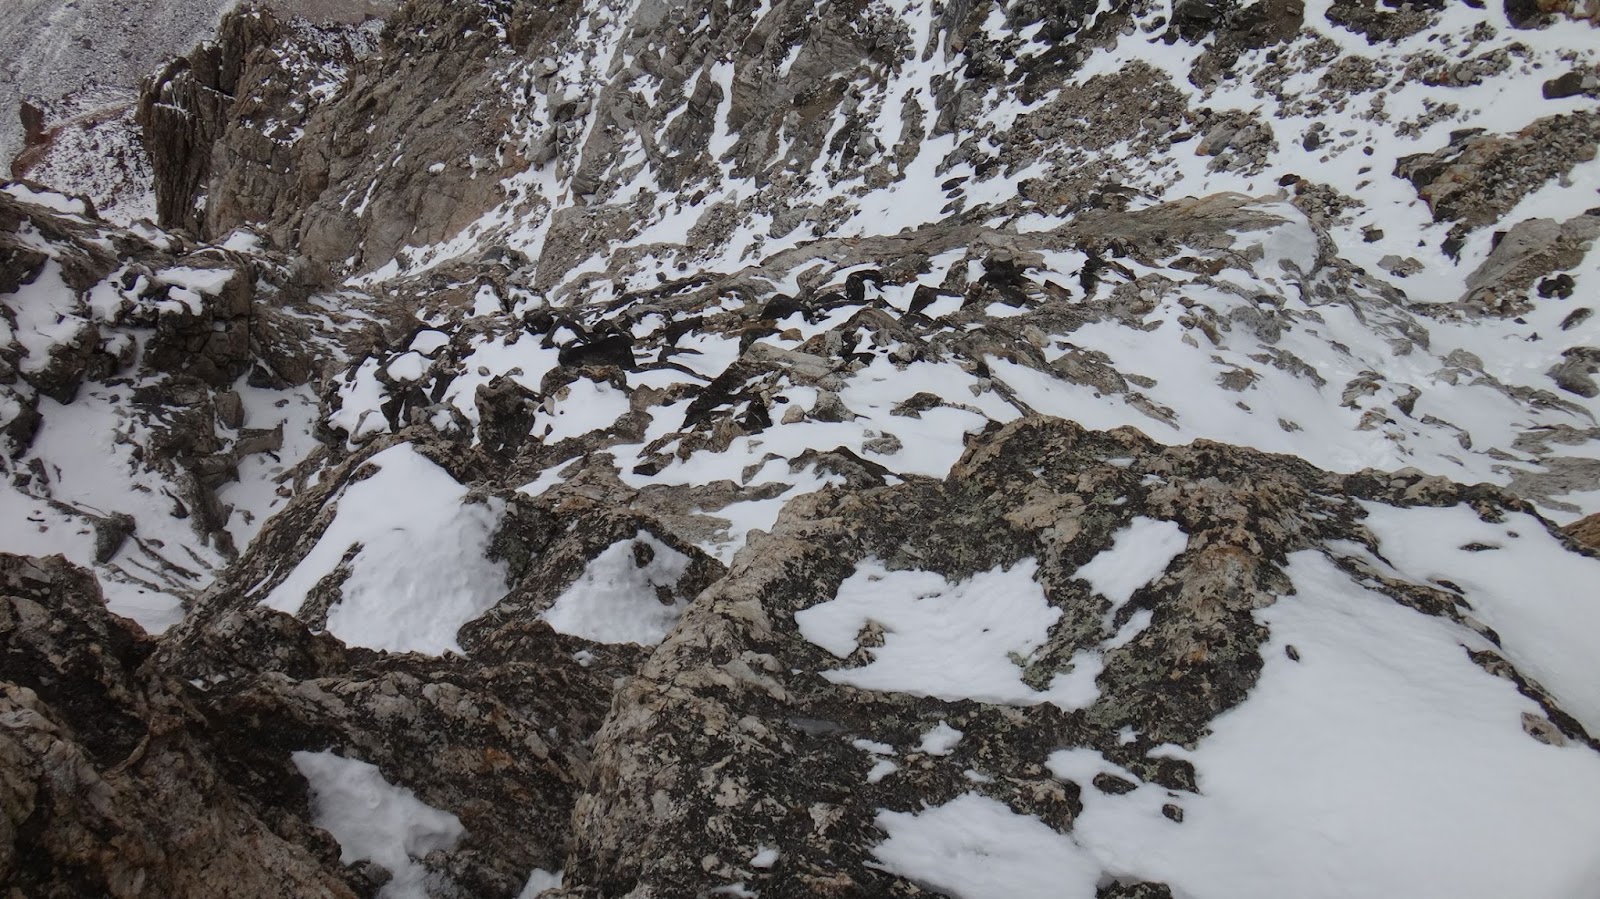
Approach to the Briggs' Slab as seen from the Cracks of Death just a few feet north of the slab.Chockstone Chimney far left. We scrambled up the far right.

Eye of the Needle, 'Belly Roll Almost', as seen after exiting the Cracks of Death.

Central Rib - top right & CR's Bench below it.
The Central Rib's Bench is just the elevated slope above the main drainage to the west.
The Central Rib's Bench is just the elevated slope above the main drainage to the west.

The Central Rib's Upper Crossover to Wall Street - located at the saddle. UXM route.

Access to the Central Rib's Black Rock Chimney is 2' north of the smooth slab. (OS Route)

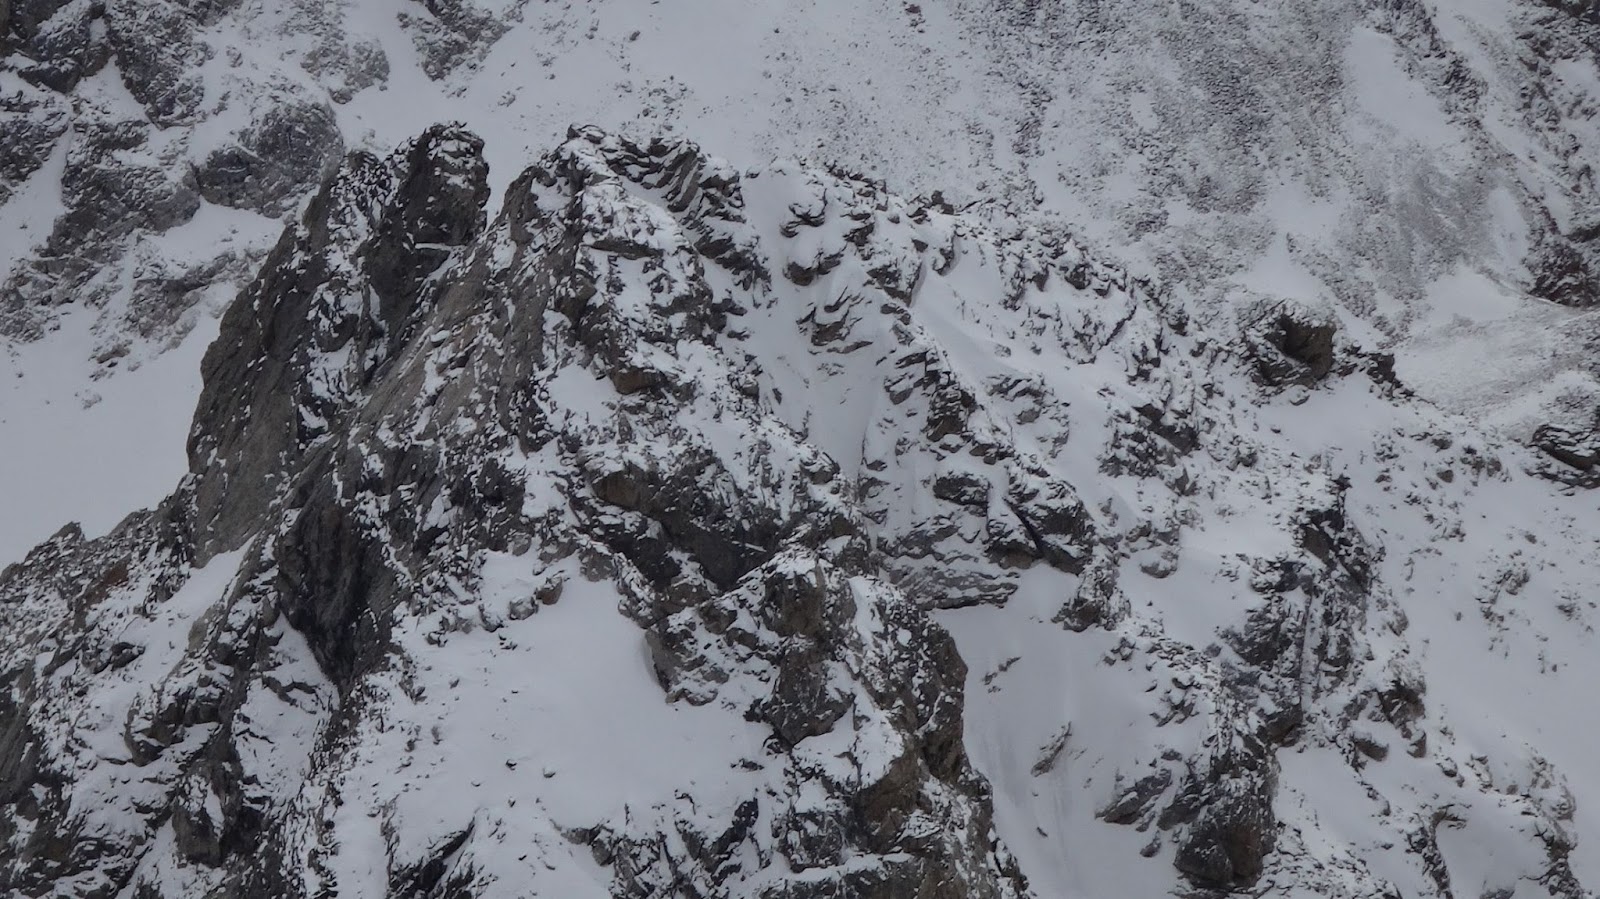
View from of the Central Rib of the Upper Western Rib and the main drainage below it.
The Enclosure's SW Ridge is in the background. It's hard to make out the small Upper Western Rib in this photo. This image gives you a feel for conditions - plenty of dry holds.

View of the Central Rib with the Needle at the base of the rib. Lower Saddle in background. Dartmouth Basin far right.

Middle Teton

Central Rib's Black Rock Chimney.

Central Rib by upper access to the BRC
The exit from the Black Rock Chimney is by a drainage that runs toward Wall Street. The drainage is on the far right bottom side of image.

Wall Street
Wall Street - the snow-covered slab on the left side of the image. This is what you see after exiting the Black Rock Chimney and looking down the drainage.

View back toward the upper access to the BRC
Drainage to the Wall Street Couloir (AKA Exum Gully) to the left. Upper access to the Central Rib's Black Rock Chimney is center-right at small saddle-like opening.

View toward the Enclosure - top-center-left. Central Rib to the right.

View of the Upper Saddle. The Main Rappel to the saddle is at the top-center of the photo.

Wall Street.

View from the Upper Saddle to the north. Jackson Lake in background.


There are two common ways to reach the eastern side of the Upper Saddle. You will naturally find one or the other. The southern (yellow arrow) route is the most common route. A third way is between the two.

The summit of Mount Owen.

Lake Solitude - right.
 Click to enlarge


Approach to the Belly Roll (red arrow).

Belly Roll

The Crawl & access to the Double Chimney.

The Crawl.

Looking back toward the Belly Roll & the Upper Saddle. The Black Ice Couloir on the north side of the US is on the right.

Looking down into Valhalla Canyon.

Looking down into Valhalla Canyon. Cascade Canyon is at the north end of Valhalla. This is not an easy approach to the north aspect of the Grand.

Looking back at the Upper Saddle from the ledge before the Crawl.

Looking down the First Entrance of the Double Chimney.

Looking down the Second Entrance of the Double Chimney.

Double Chimney - midway. Tunnel & Open-'V' variations are the most common.

Double Chimney's Open-'V'.

Double Chimney's tunnel exit.

The slabby, & very slick, rock at the exit from the Double Chimney.
We didn't have crampons so it was a careful exit and re-entry on the descent. We did have an ice axe.

The Owen Chimney.

The Catwalk - looking back north toward the Owen Chimney (unseen)

The scramble from the Catwalk to the Main Rap Overlook - looking south.

Looking back toward the scramble & Catwalk. Looking north.

Sargent's Chimney (top center) as seen from the area by the Main Rappel to the Upper Saddle.

Sargent's Chimney.
A drainage runs from the south side of the chimney down to the Main Rappel to the Upper Saddle

Main Rappel - sling. Bolts are not seen.
 Sargent's Chimney


Sargent's Chimney

Main Rappel Overlook - red arrow.

Hidden Exit from Sargent's.

Hidden Exit - corner crack to exit Sargent's Chimney.

Hidden Exit - alternate exit midway into Sargent's Chimney.

The top of the alternate exit from Sargent's.

After Sargent's it's a straight shot to the summit but most climbers will zigzag their way up to the top.

Red arrow points to Sargent's Rap.
Greenish Arrow points toward Sargent's alternate route up or down. The rock band in front of the photographer hides the actual entrance to the alternate route in this photo.

Slabby Wall
Slope just under the summit. False summit (the Horse) is directly above. The center crack points toward the summit and back to Sargent's.

You can switchback to the SE to avoid climbing the Slabby Wall. The wall/slope is pretty easy to climb and the quickest ascent. There's a narrow ledge above the slabs (see below) that acts as part of the switchback.

Narrow ledge above the southern-half of the Slabby Wall.

Icefloe Lake below Middle Teton.

Delta, Surprise, Amphitheater lakes


Summit

Bradley & Taggart lakes on right.

View to the south


View toward Jackson.

The GT's East Ridge directly below.

Summit monument with Mt. Moran rising high above.


Cascade Canyon - right.

Table Mtn.
Middle Teton


Toasty.

Owen-Spalding's southwestern approach just below the summit.

Cascade to Middle.

Teewinot to Table Mtn.

Sargent's Rap

The top of Sargent's alternate exit.

View of the scramble just above the top of the Owen Chimney. The chimney is on the right side of the photo at the base of the "wall" to the far right.

Owen Chimney. We climbed down the chimney. On the way up we took the Catwalk.

Owen Chimney

Owen Chimney

View of the first opening of the Owen Chimney from the near the middle of the chimney.
From the first opening you can access the Catwalk's narrow northern tip. You can also access the Owen-Chimney Bypass Chimney to the south.

Valhalla Canyon with Cascade Canyon at the top.

Double Chimney - tunnel exit and access to the Open-'V'.

DC

View directly above the Double Chimney of the scramble to the Catwalk. We took the Owen Chimney to access the Catwalk.

You can climb the southern side of the DC to exit the DC. Most climbers exit from above the tunnel.

The northern slot of the DC. Not used very often.

Midway down the DC. View from the Open-'V'. DC's Second Entrance runs to the right. The First Entrance is a pull-up move and on the far left.


View from the 2nd Entrance down into Valhalla Canyon.


View from the First Entrance.

First Entrance of the Double Chimney - lower yourself down.

1st Entrance DC.

The Crawl & access to the DC. Looking north toward the Double Chimney's two entrances.

Upper Saddle's northern side.
Black Ice Couloir drains into Valhalla Canyon
Black Ice Couloir drains into Valhalla Canyon


Approach to the Belly Roll - descent.

Belly Roll - go over or under. We went under on the descent, over on the ascent.

View into Valhalla Canyon.

Eye of the Needle.

MT

The Black Dike and the Central Rib's Needle.

Table Mtn.

Lower Saddle.

Descent to the Fixed Rope off the Lower Saddle.

Rising Moon.
Enjoy Safe Climbing
A few trip reports for April through October
July 17th, 2016 (UXM) PNG Variation
Detailed Look At Specific Route Features
All images may be used without permission or attribution for all not-for-profit purposes.
Enjoy Safe Climbing