Upper Exum Ascent & Owen-Spalding Descent
June 19th, 2016
All images may be used without permission or attribution for all not-for-profit purposes.
Overview - Upper Exum
Overview - Owen-Spalding
Overview - Owen-Spalding
June 19th


Click to enlarge
In June, climbers usually take a winter route by the Middle Teton's NE aspect (see RED dots in image). There is no exact path. Choose the safest ascent line. On this trip we took a variation of the summer trail during the ascent and came down by the winter route.
Free-soloing this route with no previous climbing experience is not recommended. Exceptional athletes with a natural climbing ability have soloed it with limited climbing experience but it's uncommon. Your descent is the 5.4 Owen-Spalding route so make sure it's in good shape for you to solo or downclimb it with a rope. The quickest & easiest route up the Grand under good conditions is the Owen route..
Trip photos in order of appearance ...
Lupine Meadows' Parking Lot.
This lot overflows quickly during the height of the summer.
This lot overflows quickly during the height of the summer.
Along the climbers' trail.
Sow with cubs....only one cub in photo.
The Sow was digging up a tree.
The Sow was digging up a tree.
That time of year....Flowers everywhere
Bradley & Taggart Lakes
First Boulder Field
The First Boulder Field is by the Platforms Camping Zone & Garnet Creek. The trail disappears in the boulders for 100 feet or so. It restarts by the creek. Start by heading west into the boulders at the sign and then follow a small depression that runs SW to the top of a large boulder with a flatish top. Go west and up some more rock until you have a good overview of the area. Look for the trail by the creek to your south-southwest. There should be a huge boulder on your right as you approach the creek. No worries. You'll get it one way or the other. There's no right or wrong way to go but there is an easiest way.
Platforms Camping Zone as seen from the boulder field
The junction to the Meadows Camping Zone
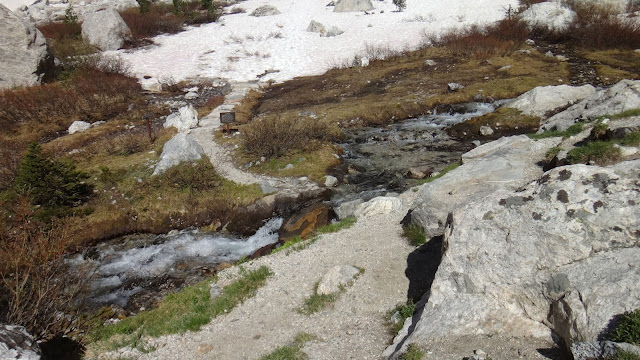
The summer climbers' trail stays to the north of the creek and runs by Spalding Falls. You'll run up a whole bunch of switchbacks and rock stairs to reach the top of the falls.
The Meadows Camping Zone
This is the view from the summer trail by Spalding Falls.
Spalding Falls
The summer trail runs below the falls and to the right of the falls in the image above (east and north)
The summer trail runs below the falls and to the right of the falls in the image above (east and north)
South Fork of Garnet Canyon
You're not headed there. This is the most common route to reach the Middle Teton's South Col & SW Couloir. The SW Couloir is the most popular and easiest route up the Middle.
Summer Climbers' Trail
The Petzoldt's Caves Camping Zone - in trees.
You will find a spring of clean cold water feeding Spalding Falls at this location.
You will find a spring of clean cold water feeding Spalding Falls at this location.
We took a variation off the climbers' trail to avoid some snow.
This is along the path used to get to Irene's Arete. After a short climb up the trail we headed west (Irene's is to the east).
Small red dots mark our snow crossing.
The snow was nice and punchy on this day, at this time.
The snow was nice and punchy on this day, at this time.
We regained the summer trail at this point.
Unseen switchbacks run between here and the Meadows.
Unseen switchbacks run between here and the Meadows.
We took this winter variation on the way back down.
The 'winter variation' follows the main drainage from the Middle Teton Glacier back to the Meadows.
The 'winter variation' follows the main drainage from the Middle Teton Glacier back to the Meadows.
East Face Grand Teton
Looking back at the snow field we crossed
Middle Teton Glacier (upper mid-left)
Lower Saddle & Morainal Camping Zone
Lower Saddle & Morainal Camping Zone
Morainal Camping Zone
The first camping spot is by this sign. The 2nd Boulder Field (unseen) is above this sign and to the north. The summer trail is next to this sign.
2nd Boulder Field
You may see the Jackson Hole Mountain Guides camping hut at the crest of the slope on the northern side of the trail as you approach the Morainal Camping Zone. It's between Disappointment Peak & Teepe Pillar. It's out of sight in this image. We are looking back at the Second Boulder Field.
Camping spot directly in front of photographer.
Looking back
Camping spots can be hard to spot. They blend in with the rock.
There are many many locations for camping on both sides of the trail.
There are many many locations for camping on both sides of the trail.
Next to the trail at the upper end (western end) of the camping zone.
The bootpack at the headwall
The snow wasn't in the best shape when we arrived (late in the morning - closer to noon).
The Fixed Rope wasn't being used.
It may be available before July.
It may be available before July.
View toward the Upper Saddle from the Lower Saddle
View of the Grand Teton's south aspect
View from the Lower Saddle's SE Corner (by water hose)
The water hose
Exum & Ranger's huts. Not public huts.
We hiked up the south side of the saddle to get this picture. GT climbers are not headed here.
We hiked up the south side of the saddle to get this picture. GT climbers are not headed here.
You can go any way you want but some ways are easier & safer than others.
There are camping spots on the western side of the saddle below the Rest Stop
View toward the Western Ribs (see below), the Owen-Spalding Couloir (center), and the Dartmouth Couloir (far left)
Stay to the west side of the Needle - right by it's western aspect, usually.
Conditions vary with the weather but even on nice sunny days it can be very icy by the western aspect of the Needle. It's often shaded and it's a drainage area. If you find ice here, it doesn't mean that ice is covering everything else.
We only saw a few climbers.
It looked like one person had been on the Upper Exum recently (only one track in the snowy areas).
Some climbers have been running right up the main drainage (OS Couloir)
We took the Briggs Slab.
The Eye of the Needle was plugged with snow. Sometimes it is very easy to climb over the EOTN. Not always, though.
Briggs' Slab
You are looking up at a drainage that is really just an extension of the Chockstone Chimney. The drainage runs to the ridgeline of the Central Rib. It takes us to the Lower Crossover. From there, you can scramble down into the Wall Street Couloir. You will ascend a large gully to reach Wall Street and the Upper Exum Ridge. We are just 'behind' the Needle in this photo.
Looking up at the Central Rib's Bench
View from the eastern side of the Central Rib
The couloir's snow was probably icy & rock-hard in the early morning. It was punchy when we arrived.
Wall Street Couloir's snow crossing.
Upper end of Wall Street - nearing the Step Across
This is the start of the Step Across at the end of Wall Street. We took the lower ledge.
Step Across - we took GREEN Route
Step Across - top ledge RED dots
Instead of crossing the gap, climbers work their way around the corner.
Looking back at the Step Across' gap. Climbers rarely if ever 'step across' the gap like ol' Exum.
Instead of crossing the gap, climbers work their way around the corner.
Looking back at the Step Across' gap. Climbers rarely if ever 'step across' the gap like ol' Exum.
Golden Stair
Minor 'boulder' problem just above the Golden Stair
This is also the location to rap back down to Wall Street if you need to do so. A 60m rope works fine. You'll land on the fat part of Wall Street. You can visually check your landing zone.
View toward the Enclosure from the Exum Ridge
Travel any way you wish - mostly a scramble.
Access to the WT. Climbers travel behind the rock features outlined in red.
The RED lines just block out some rock features.
You will be 'behind' those rock features as you approach the Wind Tunnel's boulder problems.
Flake at the entrance to the Wind Tunnel
Wind Tunnel's Boulder Problems
Wind Tunnel's Boulder Problems
Wind Tunnel Gully
Carman's Pinnacle - a detour if you're bored.
This is a great place, or the easier ridgeline just north of it, to get some exposure.
This is a great place, or the easier ridgeline just north of it, to get some exposure.
Wind Tunnel Gully
Looking over at the Ford Couloir
Friction-Pitch Bypass Chimney - far right
Puff-n-Grunt dihedral - far left
Puff-n-Grunt dihedral - far left
Western Chimney
This is west of the Jern & Friction Pitch.
Jern Dihedral leading to the Friction Pitch
Friction Pitch - its far left (western) side
Middle view of FP
View up the western side of the Friction Pitch (the far western side is uncommon, less friction, different vibe)
Friction Pitch's eastern side. The Knob Line is the most common line.
Friction Pitch
Most climbers use the Jern to reach the Friction Pitch. The easiest way
to bypass the Friction Pitch is the eastern variation called the Friction-Pitch Bypass
Chimney.
There are several ways to exit the Western Chimney to reach the Friction Pitch. Some cover terrain just west of the Jern. Perhaps the quickest way is to exit onto the ledge at the base of the Friction Pitch. About mid-way up the chimney, you'll find yourself at a big 'step' in the chimney (a down step before a big (!) overhanging chockstone feature). Look for an opening - low spot - in the wall to the east. And look for an old cam. Exit there. The upper Western Chimney can be used to bypass the Friction Pitch but it ain't for novices and the rock kinda sucks by the overhanging chockstone. The easiest exit may not be obvious (it will be if you examine it from above on a previous trip).
There are several ways to exit the Western Chimney to reach the Friction Pitch. Some cover terrain just west of the Jern. Perhaps the quickest way is to exit onto the ledge at the base of the Friction Pitch. About mid-way up the chimney, you'll find yourself at a big 'step' in the chimney (a down step before a big (!) overhanging chockstone feature). Look for an opening - low spot - in the wall to the east. And look for an old cam. Exit there. The upper Western Chimney can be used to bypass the Friction Pitch but it ain't for novices and the rock kinda sucks by the overhanging chockstone. The easiest exit may not be obvious (it will be if you examine it from above on a previous trip).
Friction Pitch - looking back at the small ledge (darker grayish rock) above the crux of the FP.
FP
The Notch Gully
This is just above the Friction Pitch (& Puff-n-Grunt, FP Bypass Chimney). Make the easy exit to the right (go east) at the top (at notch).
V-Pitch at top of photo. Turn east here to climb out of the gully.
View down the Ford Couloir after climbing out of the gully.
Looking across the Ford at the East Ridge
V-Pitch
Looking down the ridgeline from just below the V-Pitch. The Ford Couloir is far left.
Crestline of Upper Exum Ridge with Lower Saddle in background
Snow in V-Pitch
VP
Above V-Pitch.
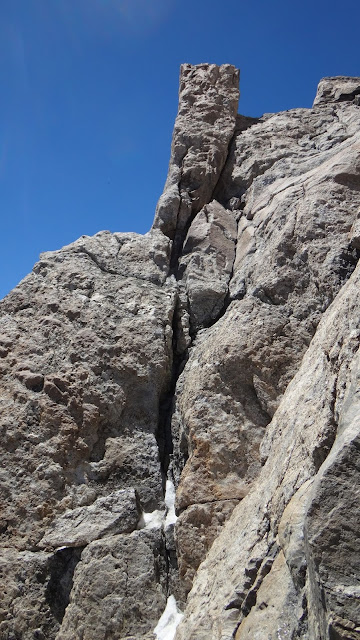
The WLC is a chimney, slab, crack, lieback and it has many names.
The ledge system just to the west (unseen) is an easy escape to the Main Rap to the Upper Saddle. Head down until you reach a low point in the ledge system (small drainage running east-west). The Main Rap Overlook will be just to your west and Sargent's Chimney will be just to your east.
The L-Shaped Notch
The LSN is to the northeast of the WLC. You can go directly to the ridgeline after the West-Leaning Crack and run along the ridgeline (Boulder Problem in the Sky). Or, you can head for the LSN and then run to the ridgeline or use the BPITS bypass.
L-Shaped notch.
You can turn east at notch and climb to the Boulder Problem in the Sky. Or climb down into a gully and then back up to the ridge to bypass the BPITS. You can also reach the bypass from a location right below the BPITS. The bypass is not necessarily easier if conditions are poor.
View of scramble to the ridgeline toward the BPITS
Looking up at the BPITS
Not too difficult as far as jam-cracks go but slightly exposed.
Looking down the southern jam crack
High Class climbing shoes for crackn'
The Horse. Looking North along the Grand Teton's upper ridgeline
The Horse - pointy feature just south of summit.
Stay on the eastern side of the ridge and go under the Horse. Scramble up to the summit on its northern side. Or head for the SW side of the Horse and climb it.
Jackson Lake as seen from the summit.
Bet ya never see shoes like these on the Grand.
Delta
Lupine Meadows Parking Lot
DESCENT OF THE OWEN-SPALDING
The Grand Teton's Owen-Spalding Route Overview
Overview of the Owen-Spalding's variations & the upper part of the Exum ridge
Click to enlarge
The Downclimb

Western aspect just below summit.
DESCENT OF THE OWEN-SPALDING
The Grand Teton's Owen-Spalding Route Overview
Overview of the Owen-Spalding's variations & the upper part of the Exum ridge
Click to enlarge
The Downclimb

Western aspect just below summit.
This is the view of the Owen-Spalding's approach to the summit. The photo was taken from the summit and it shows the features just below the summit on the western aspect of the Grand. Climbers descend to the SW. The Slabby Wall is directly below the Horse. You can use a narrow ledge above the Slabby Wall to switchback around it. Head to the SW along the narrow ledge until you find an easy scramble to the bottom of the Slabby Wall. Once you're below the Slabby Wall, look for it's big center crack which points toward Sargent's (and back to the summit). Follow an easy straight line down the mountain until the scrambling stops. You're in a drainage-like feature between the Slabby Wall and a location near the top of Sargent's. Look to your south for Sargent's Chimney or it's alternative route, the Hidden Exit variation from Sargent's. The top of the Hidden Exit is a small chute and it's just to the north of Sargen't rappel.
We scrambled down to the narrow 'switchback' ledge above the Slabby Wall on the descent.
The photographer is looking SWish
The photographer is looking SWish
Slabby Wall - which we bypassed
The narrow ledge is along the top of the southern-half of the Slabby Wall
View toward 'switchback' to SE to bypass the Slabby Wall
Sargent's Rap slings
Sargent's Chimney
Alternate Exit from Sargent's Chimney
Hidden Exit variation
Hidden Exit variation
NW corner crack of the Hidden Exit.
You take this to leave Sargent's main chimney, or re-enter.
You take this to leave Sargent's main chimney, or re-enter.
Just a short walk between the Owen & Sargent's. The northern wall at the base of Sargent's lines up with (points to) the top of the Owen Chimney.
Looking down the Owen Chimney
Owen Chimney
Owen Chimney
Crux of Owen Chimney when dry
Owen Chimney
Owen Chimney
Catwalk
Looking down into the Double Chimney's Open-'V'.
Looking at the southeast variation to reach the Catwalk after exiting the Double Chimney.
Looking down the 1st Entrance of the Double Chimmey
Tunnel & Open-'V' in DC
Looking down toward the ledge directly below the Double Chimney's 2nd entrance.
Double Chimney area
1st Entrance to the Double Chimney - Pull-up move
All sorts of funky pro...probably skiers
All sorts of funky pro...probably skiers
Looking down from the Crawl
The Crawl - looking southish
The Crawl - looking northish
View toward Belly Roll
The Belly Roll - looking southish
Belly Roll - looking northish
Belly Roll
Upper Saddle as seen from the Belly Roll area - looking southish
Looking up at the alternate 2x70' raps area
Main Rappel area
Exit off the upper eastern side of the Upper Saddle (southern exit)
Exit off the upper eastern side of the Upper Saddle (southern exit)
Exit off the upper eastern side of the Upper Saddle (southern exit)
Southern access to the Upper Saddle's upper eastern side.
We took the Boulder Access during April & May due to snow conditions.
We took the Black Rock Chimney but the main drainage would have been fine.
Central Rib far right (east)
Central Rib's Black Rock Chimney
Ramp off of the Central Rib's ridgeline
Smooth slab by the access to the Central Rib's Black Rock Chimney
The Briggs Slab is by the Chockstone Chimney
Looking down the Chockstone Chimney
Central Rib's Bench is center-right
We took the Briggs' Slab up and down
Chockstone Chimney
So many variations in and out of the Chockstone Chimney's bottom half.
We went up the drainage and around the rock band (to the right in photo) to reach the Briggs Slab. The Chockstone Chimney is at the bottom right corner of the image.
This western side of the Needle is usually icy but it's still the best way up and down. Lower Saddle in background.
The Black Dike and the Needle (center)
View from the Lower Saddle toward the Grand Teton
We took the winter route on the way down. We took a variation of the summer route on the way up.
Meadows' Headwall
Avoid this drainage.
North Fork of Garnet Canyon - Meadows' Headwall
Spalding Falls
Overview - Upper Exum
Overview - Owen-Spalding
Detailed Look At Specific Route Features
Route Overviews - Marked Up Photos & The Approach
Enjoy Safe Climbing
The summer climbers' trail runs to the NE of Spalding Falls and the above it to the NW.
A few trip reports for April through October
July 17th, 2016 (UXM) PNG Variation
Overview - Owen-Spalding
Detailed Look At Specific Route Features
Enjoy Safe Climbing


.jpg)


